How to Make Homemade Stock and Broth: A Beginner’s Guide
In the world of home cooking, few things can rival the flavor-boosting magic of homemade stock and broth. These versatile liquids serve as the backbone for countless recipes, from soups and stews to sauces and risottos. While store-bought versions are convenient, they often lack the depth and nuance that homemade versions provide. Plus, making stock and broth at home is a sustainable way to use kitchen scraps and reduce waste. This beginner’s guide will walk you through the simple steps to craft your own flavorful concoctions.
Understanding the Basics: Stock vs. Broth
Before diving into the cooking process, it’s important to distinguish between stock and broth, as they are often used interchangeably but are slightly different.
-
Stock is made by simmering bones, along with vegetables and herbs, for several hours. It’s typically unseasoned and has a thicker, gelatinous texture due to the collagen extracted from the bones. Stock serves as a solid base for soups and sauces.
-
Broth is made primarily from meat and often vegetables, simmered for a shorter period. It’s usually seasoned and has a lighter, more flavorful profile, suitable for drinking alone or as a soup base.
Ingredients and Equipment
For either stock or broth, you'll need a few basic ingredients and tools:
Ingredients:
- Bones (for stock): Chicken, beef, or fish bones work well.
- Meat (for broth): A whole chicken or cuts like thighs, drumsticks, or beef shanks.
- Vegetables: Common choices include onions, carrots, and celery.
- Herbs and Spices: Bay leaves, parsley, thyme, peppercorns, and garlic.
- Water: Cold water is best as it helps extract more flavor.
Equipment:
- Large Stockpot: A sturdy and spacious pot is essential for making stock or broth.
- Strainer or Cheesecloth: For separating solids from the liquid.
- Storage Containers: For freezing or refrigerating the final product.
Step-by-Step Process
-
Prepare Your Ingredients:
- If using bones, consider roasting them in the oven for added depth of flavor. This step is optional but recommended.
- Roughly chop vegetables; there's no need for fine dicing. If desired, leave the skins on for additional nutrients.
-
Start Simmering:
- Place bones or meat in the stockpot and cover with cold water.
- Bring the water to a gentle simmer over medium heat. Avoid boiling; this can cloud the stock or broth.
- Once simmering, you may notice foam rising to the surface. Skim this off with a spoon for a clearer liquid.
-
Add Aromatics:
- After skimming, add your vegetables, herbs, and spices to the pot.
- Continue simmering for 4-6 hours for stock or about 1-2 hours for broth. Longer cooking times release more collagen and nutrients.
-
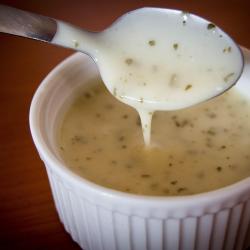
Strain the Liquid:
- Using a strainer or cheesecloth, remove all solids. This leaves you with a pure liquid packed with flavor.
-
Cool and Store:
- Allow the liquid to cool before transferring it to storage containers.
- Stock can be refrigerated for up to five days or frozen for future use. Broth has a similar shelf life.
Tips for Success
- Conserve Scraps: Collect vegetable peels, ends, and bones in a freezer bag over time; these are perfect for making stock.
- Adjust Seasoning Later: When using stock or broth as a recipe base, wait to adjust salt levels until the end to avoid over-seasoning.
- Experiment with Flavors: Feel free to add additional herbs or spices to customize your stock or broth.
Conclusion
Crafting homemade stock and broth is a rewarding culinary endeavor that elevates your cooking. With minimal ingredients and equipment, you can produce a flavorful foundation for any dish while minimizing kitchen waste. Follow this beginner’s guide, and soon you'll be enjoying the rich and complex flavors that only homemade stock and broth can provide. Happy cooking!