How to Build a Birdhouse
Building a birdhouse is an enjoyable and rewarding project that not only enhances your outdoor space but also contributes positively to the environment by providing a safe nesting spot for birds. Whether you're a seasoned DIY enthusiast or trying your hand at a new hobby, crafting a birdhouse can be a gratifying experience. This guide will walk you through the necessary steps to create a basic birdhouse to welcome a variety of feathered friends into your garden.
Materials Needed
To build a simple birdhouse, you'll need the following materials and tools:
Materials:
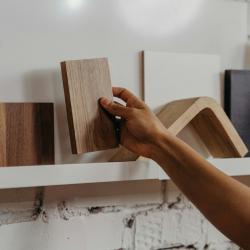
- Wood: Cedar, pine, or plywood is commonly used.
- Nails or Screws: For joining the pieces together.
- Wood Glue: An optional element for extra sturdiness.
- Paint or Wood Stain: To protect the wood from the elements.
- Sandpaper: To smoothen any rough edges.
- Hinge: For the roof, to allow for easy cleaning.
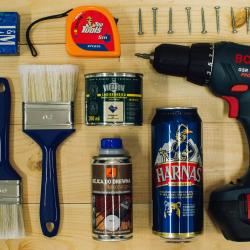
Tools:
- Saw: A handsaw or power saw to cut the wood.
- Drill: For making the entrance hole and assembling parts.
- Measuring Tape: To obtain precise dimensions.
- Hammer or Screwdriver: Depending on whether you use nails or screws.
- Paintbrush: If you choose to paint or stain the birdhouse.
- Clamps: To hold pieces together while the glue sets.
Steps to Build the Birdhouse
Step 1: Planning and Measurements
Before cutting any wood, decide on the size of your birdhouse. A typical birdhouse for small to medium-sized birds might measure 6 inches by 6 inches for the floor, with a height of about 9 inches. The entrance hole should be about 1 to 1.5 inches in diameter depending on the species you want to attract. Ensure you have a slanted roof for rain runoff.
Step 2: Cutting the Wood
Using your saw, cut the wood according to your plan:
- Front and Back Panels: Two pieces, cut to your chosen height and width.
- Side Panels: Two pieces that will form the sides of the birdhouse.
- Floor Panel: A square piece fitting the width of your structure.
- Roof Panels: Two rectangular pieces, cut slightly larger to form an overhang.
Step 3: Creating the Entrance Hole
Drill an appropriately sized hole in the front panel to serve as the birdhouse entrance. This should be positioned about 2 inches from the top to protect from predators and weather conditions.
Step 4: Sanding the Parts
Use sandpaper to smooth all the cut edges and surfaces. This will prevent splinters and make your birdhouse safer for the birds.
Step 5: Assembly
Begin assembling the parts:
- Attach the floor to the side panels using nails or screws (and wood glue for extra strength).
- Secure the front and back panels to the structure.
- Attach the roof panels, using a hinge for one, to allow the roof to open for cleaning.
Step 6: Finishing Touches
Once assembled, you can choose to paint or stain your birdhouse to protect it from harsh weather conditions. However, avoid using toxic finishes that might harm the birds. Consider using muted colors that blend with the natural surroundings.
Step 7: Installing the Birdhouse
Choose a suitable location for your birdhouse. It should be elevated to keep the birds safe from predators. Ideally, place it in a sheltered spot facing away from prevailing winds. Use a sturdy post, tree, or fence to mount the birdhouse securely.
Conclusion
Building a birdhouse is not only a constructive project but also adds value to your garden or backyard by providing a habitat for birds. With this simple guide, you now have all the knowledge needed to create a birdhouse that can attract and protect feathered visitors. Remember, while functionality is key, feel free to add personal touches and creativity to your design. Happy building!