How to Contour and Highlight for a Sculpted Face
Achieving a sculpted face through makeup is an art that has gained immense popularity over recent years. By mastering contouring and highlighting techniques, you can enhance your natural features and create dimension effortlessly. Whether you're preparing for a special occasion or simply want to refine your everyday makeup routine, understanding these foundational techniques can transform your appearance. Here’s a step-by-step guide to help you contour and highlight like a pro.
Understanding the Basics: Contour vs. Highlight
Contouring involves using a matte product, usually a few shades darker than your natural skin tone, to create shadows and define areas of the face. Common areas to contour include the hollows of the cheeks, jawline, sides of the nose, and the perimeter of the forehead. This technique helps to slim and chisel features.
Highlighting, on the other hand, involves using a product that's lighter and often has a bit of a glow to it. The purpose is to bring forward certain areas of the face, such as the tops of the cheekbones, bridge of the nose, brow bones, and cupid's bow. Highlighting adds brightness and gives the skin a radiant, youthful appearance.
Products You’ll Need
-
Contour Products: These can be powders, creams, or sticks. Choose a shade that is 2-3 shades darker than your skin for a more natural look.
-
Highlighter: Opt for a shade that complements your skin tone. Pale champagne or pearly shades work well for lighter skin tones, while golden and bronze tones are perfect for medium to dark skin tones.
-
Brushes/Tools: A contour brush or a flat foundation brush, a fluffy highlighting brush, and a beauty sponge or blender for seamless application.
Step-by-Step Guide
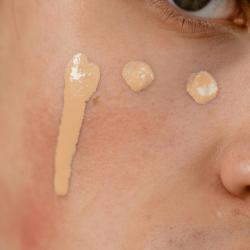
Step 1: Preparation
Start with a clean, moisturized face. Apply your foundation and concealer before beginning the contouring process as you normally would. Having an even base will ensure the contour and highlight blend seamlessly into the skin.
Step 2: Contour
-
Find Your Cheekbones: Suck in your cheeks or feel for the hollow under your cheekbones. Begin applying contour from the top of the ear toward the corner of the mouth, stopping around mid-cheek.
-
Shape Your Jawline: Apply contour along the jawline to define and create a chiseled look. Blend downwards to avoid a harsh line.
-
Forehead: If you have a larger forehead, apply contour near the hairline to give an illusion of a smaller forehead. Blend well into the hairline.
-
Nose: For a more defined nose, apply the contour down the sides of the nose and on the tip. Use a smaller brush for precision and blend thoroughly to soften any harsh lines.
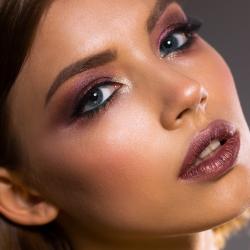
Step 3: Highlight
-
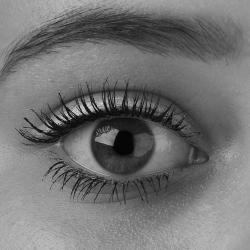
Cheekbones and Brow Bone: Apply highlighter to the tops of your cheekbones and just below your eyebrows to lift and brighten the face.
-
Nose: Add a touch of highlighter down the bridge of your nose to make it appear straighter.
-
Inner Corners of Eyes and Cupid’s Bow: Brighten the inner corners of your eyes and your cupid’s bow (the dip above your upper lip) to open up the eyes and accentuate your lips.
Step 4: Blend
Blending is crucial in contouring and highlighting. Use a beauty sponge or a buffing brush to blend away any harsh lines and make the makeup appear more natural. The goal is to have a seamless transition between the contoured areas, highlights, and the rest of your face.
Step 5: Set Your Makeup
To ensure longevity, especially if you have oily skin or are planning to wear your makeup for a long period, set your makeup with a translucent setting powder. Lightly dust it over areas where you applied contour and highlight, focusing on the high points of the face to maintain the glow.
Tips for a Perfect Contour and Highlight
- Less is More: Start with minimal product and build up as needed. It's easier to add more than to take away.
- Blending is Key: The most critical step in contouring and highlighting is blending. Without it, the makeup can look unnatural.
- Customize: Adapt the placement and intensity of contour and highlight according to your face shape and desired look.
By following these steps, contouring and highlighting can become a simple yet effective part of your beauty regimen. Practice these techniques to enhance your natural beauty and achieve a beautifully sculpted face.