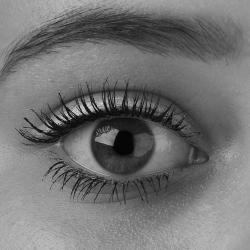
How to Master the Art of Winged Eyeliner
Winged eyeliner is an iconic makeup look that has graced the eyes of countless fashion icons and celebrities. Its timeless appeal lies in its ability to elevate any makeup look, adding an element of drama and sophistication. However, achieving the perfect winged eyeliner can be daunting, especially for beginners. Fear not! With practice and some helpful tips, you can master this art form and achieve the flawless flick you've always desired.
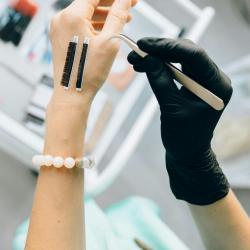
1. Start with the Right Tools
Before diving into technique, it's crucial to have the right tools. Invest in a high-quality eyeliner that's easy to maneuver. There are several types to choose from:
- Liquid Eyeliner: Offers precision and a bold finish. It’s ideal for those with a steady hand and some experience.
- Gel Eyeliner: Comes in a pot and is applied with a brush. It’s versatile and forgiving, perfect for building thickness.
- Pencil Eyeliner: Provides a softer look, great for beginners or those wanting a more subtle effect.
- Felt-tip Eyeliner: Combines the ease of a pencil with the precision of liquid, making it an excellent choice for novices.
2. Prep Your Eyes
Start with a clean canvas. Remove any excess oils from your eyelids by applying a primer or setting powder. This helps the eyeliner adhere better and prevents smudging throughout the day.
3. Mapping the Wing
The key to a symmetrical wing is mapping it out before applying the eyeliner. Follow these steps:
- Determine the Angle: Use the natural line of your lower lash line as a guide. The wing should extend in the same direction.
- Use a Tool: A piece of tape, a business card, or a spoon can serve as a guide to ensure your angles are even on both sides.
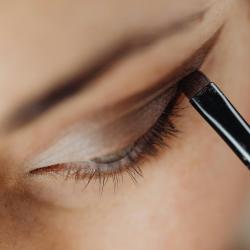
4. Begin with the Outline
Lightly sketch the outline of the wing with short, gentle strokes. Start from the outer corner of your eye and work your way towards the center of your eyelid. This outline serves as a guide for filling in the wing and provides an opportunity to adjust the angle or thickness as needed.
5. Fill in the Wing
Once you’re satisfied with the outline, fill in the wing. Use small, controlled strokes to avoid mistakes. Ensure that the wing is connected smoothly to the rest of the eyeliner on your eyelid.
6. Perfect the Inner Corners
For a polished look, extend the eyeliner into the inner corners of your eyes. This step can be tricky, so use a light hand and a steady gaze. This will create a continuous line that enhances the shape of your eyes.
7. Clean Up Any Mistakes
Even the steadiest hands make mistakes. Use a cotton swab dipped in makeup remover to clean up any uneven lines or smudges. This can help sharpen the wing and achieve a crisp finish.
8. Final Touches
Once your eyeliner is complete, apply mascara to enhance your lashes. For added drama, consider using false lashes, which can complement the winged look beautifully.
9. Practice Makes Perfect
Mastering winged eyeliner is a skill that improves with practice. Don’t be discouraged by initial attempts; every mistake is a learning opportunity. Try different products and techniques to find what works best for you.
Conclusion
Perfecting winged eyeliner is an art that requires patience and practice. With the right tools and techniques, you can achieve the stunning, symmetrical wings that have become a staple in the world of beauty. So, grab your eyeliner and start practicing. Soon enough, you’ll be turning heads with your flawless flicks!