Step-by-Step Guide to the Perfect Smoky Eye
Creating the perfect smoky eye can seem intimidating, especially for makeup beginners. However, with a bit of practice and the right tools, you can achieve this classic, sultry look in no time. Whether it’s for a night out, a special event, or just to feel fabulous, this guide will walk you through each step to make your eyes pop with a smoky allure.
Step 1: Gather Your Tools
Before starting, it's important to have the right tools and products at your disposal. You’ll need:
- Eyeshadow palette with at least three shades: a light neutral, a medium tone, and a dark color (typically black or deep brown).
- Eyeliner pencil or liquid liner, preferably in black or a deep hue.
- Mascara.
- Eye primer.
- Brushes: a flat shader brush, a blending brush, and a pencil brush.
- Optional: false eyelashes for extra drama.
Step 2: Prepare Your Base
A smooth, long-lasting application starts with a good base. Begin by applying an eye primer across your eyelid. This will help the eyeshadow adhere better and stay vibrant throughout the day. If you don’t have a primer, a thin layer of concealer or foundation can also work.
Step 3: Apply the Base Shade
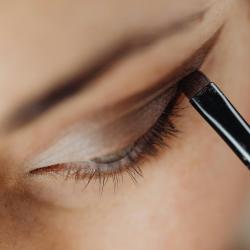
Using your flat shader brush, apply the lightest shade in your palette over your entire eyelid. This color acts as the foundation of your look, providing an even base and making blending easier. Be sure to also sweep this color along the brow bone to highlight the arch of your eyebrows.
Step 4: Define with the Medium Shade
Next, take the medium-toned eyeshadow and apply it to your crease using a blending brush. This will add dimension to your eyes. Blend the color in a windshield-wiper motion, ensuring a seamless transition between the base shade and this middle tone. For added definition, you can bring the color slightly above your crease if desired.
Step 5: Intensify with the Dark Shade
Now it’s time to add depth. With the pencil brush, apply the darkest shade to the outer corner of your eyelid, forming a small "V." Slowly blend this color inward towards the center of your eyelid, concentrating the majority of the pigment on the outer edge. Use your blending brush to soften any harsh lines, achieving that smoky effect.
Step 6: Line Your Eyes
Line your upper and lower lash lines with an eyeliner pencil or liquid liner. For the top lashes, start with a thin line at the inner corner and gradually thicken it as you move outward. Smudge the liner slightly with your pencil brush or an angled brush for a softer, smoky look. You can also apply a bit of the dark shadow over the liner to blend and intensify.
Step 7: Highlight the Inner Corners
To add a touch of light, apply a small amount of the lightest eyeshadow shade (or a dedicated highlighter) to the inner corners of your eyes. This will brighten your eyes and enhance the overall look.
Step 8: Apply Mascara and False Lashes
Finish off your smoky eye with a generous coat of mascara on both your upper and lower lashes. For extra drama, consider applying false eyelashes. They add volume and enhance the smoky effect, making your eyes appear larger and more captivating.
Tips for Mastering the Smoky Eye
- Blending is Key: The hallmark of a great smoky eye is seamless blending. Take the time to blend each shade thoroughly.
- Choose Colors that Complement Your Eye Color: While traditional smoky eyes rely on blacks and grays, feel free to experiment with colors. Plums, bronzes, or dark greens can also create stunning smoky effects and can enhance different eye colors.
- Practice Makes Perfect: Don’t be discouraged if you don’t get it right the first time. Practice the technique and adjust the intensity to suit your style and occasion.
By following these steps and practicing consistently, you can master the smoky eye, a timeless makeup look that continues to captivate and inspire. So go ahead, experiment with different shades, and have fun creating your own flawless smoky eye.


