How to Patch a Hole in Drywall
Drywall, also known as gypsum board or plasterboard, is a common material used in the construction of interior walls and ceilings. Despite its versatility and ease of installation, drywall can be prone to damage. Whether it's from a doorknob, an accidental bump, or moving furniture, holes in drywall are a frequent household issue. Fortunately, with a few tools and the right materials, patching a hole in drywall can be a straightforward DIY project. Here's a comprehensive guide on how to repair those unsightly holes and restore your walls to their original condition.
Materials and Tools You’ll Need
- Drywall patch kit (for small holes) or drywall patches or sheets (for bigger holes)
- Drywall compound or spackle
- Putty knife
- Sanding sponge or sandpaper (120-150 grit)
- Utility knife
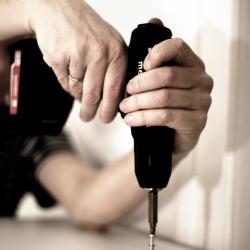
- Drill (with a drywall cutting bit for large holes)
- Paint (matching the wall color)
- Primer (optional)
- Drywall tape (optional for larger holes)
- Scrim or mesh (for added reinforcement)
- Dust mask
- Paintbrush or roller
- Safety goggles
Step-by-Step Instructions
Step 1: Assess the Damage
Before you begin, assess the size of the hole. For small holes (up to ½ inch), you can usually get by with a smear of spackle. Medium-sized holes (up to 5 inches) require a patch kit, while larger holes might necessitate cutting a new piece of drywall to fit into the wall.
Step 2: Prepare the Area
- Small Holes: Clean any dust or loose debris from the hole using a brush or cloth.
- Medium and Large Holes: Use a utility knife to cut away frayed or damaged edges for a clean, square cut. For larger holes, drill carefully around the perimeter to make the cutout.
Step 3: Apply the Patch
- Small Holes: Use a putty knife to apply spackle directly to the hole, smoothing over with the knife until it is level with the wall. Allow it to dry according to the manufacturer’s instructions.
- Medium Holes: Stick a self-adhesive patch over the hole, ensuring it extends beyond the damaged area. Apply a layer of drywall compound over the patch, feathering the edges to blend with the wall.
- Large Holes: Insert a piece of drywall cut to size into the hole. Use drywall tape over the seams if necessary, and secure with compound.
Step 4: Let It Dry
Allow the spackle or compound to dry completely. This could take a few hours to a day, depending on humidity and the thickness of the application.
Step 5: Sand the Surface
Once dry, use a sanding sponge or sandpaper to smooth any raised areas to ensure the surface is flush with the rest of the wall. Wear a dust mask and safety goggles to protect yourself from airborne particles.
Step 6: Apply a Second Coat (Optional)
For a more seamless repair, apply a second thinner coat of drywall compound over the patch, extending further out from the original application. Feather the edges for a smooth transition. Let it dry completely and sand again if necessary.
Step 7: Prime and Paint
Prime the repaired area if using a large patch or if recommended by the compound manufacturer. Once primed, paint over the area using a paintbrush or roller, matching the existing wall color as closely as possible. Allow the paint to dry fully, and apply a second coat if needed.
Additional Tips
- Always test the color match by painting a small section first.
- For textured walls, mimic the texture using a sponge or specialty tools before painting.
- Maintain a clean workspace, and dispose of any hazardous materials according to local regulations.
By following these steps, you can confidently repair holes in your drywall, enhancing the appearance and integrity of your walls. With a little practice and patience, tackling such home repairs can save you time and money while providing the satisfaction of a job well done.

