How to Fix a Leaking Faucet in Minutes
A dripping faucet can be more than just a minor annoyance. Over time, it can waste gallons of water and lead to higher utility bills. Fortunately, fixing a leaking faucet is a straightforward task that most homeowners can handle with some basic tools and a little guidance. Follow these steps to quickly and effectively put an end to that persistent drip.
Tools and Materials Needed
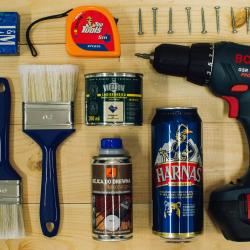
Before you begin, gather the following tools and materials. Having everything on hand will make the process smoother:
- Adjustable wrench
- Screwdriver (flathead or Phillips, depending on your faucet)
- Replacement parts (often a rubber washer or O-ring)
- Plumber’s tape
- Penetrating oil (optional, for stuck parts)
- Towel or cloth
Step-by-Step Instructions
Step 1: Turn Off the Water Supply
The first crucial step is to stop the water flow. Look for the water shut-off valves under the sink. These are typically small handles which you can turn clockwise to close. If your setup doesn't have basin-specific valves, shut off the main water supply. Test the faucet by turning it on to confirm the water is off.
Step 2: Plug the Sink Drain
To prevent small parts from falling down the drain, plug it with a sink stopper or a towel. This simple precaution can save you from the frustration of retrieving lost pieces.
Step 3: Identify Your Faucet Type
There are several types of faucets, including compression, ball, cartridge, and ceramic-disk. The repair process varies slightly depending on the type, so it's essential to know what you're dealing with.
- Compression Faucets usually have separate hot and cold handles.
- Ball Faucets have a single handle that moves over a rounded cap.
- Cartridge Faucets can have one or two handles and move smoothly without much resistance.
- Ceramic-Disk Faucets are identifiable by their wide cylindrical body.
Step 4: Remove the Handle
After determining the faucet type, remove the handle. For most faucets, you’ll uncover the screws by popping off a decorative cap. Use a screwdriver to extract the screws and gently lift the handle. If it's stuck, apply penetrating oil and let it sit for a few minutes.
Step 5: Inspect and Replace Parts
Once you have access to the inner parts, check for worn-out washers, O-rings, or cartridges, which are common culprits of leaks.
- Compression Faucets: Check the rubber washer and replace it if it appears damaged.
- Ball and Cartridge Faucets: You may need to replace the entire cartridge. Examine it for wear and tear, and insert a new one if necessary.
- Ceramic-Disk Faucets: Inspect the seals and replace them if they're worn out.
Replace any damaged parts, ensuring you use identical or compatible replacements. Apply plumber’s tape if needed around threads to ensure a tight seal.
Step 6: Reassemble the Faucet
Reassemble your faucet by reversing the disassembly process. Tighten the screws and refit the handle securely. Be careful not to overtighten, as this could cause damage.
Step 7: Turn the Water Back On
Once reassembled, turn the water back on slowly by rotating the shut-off valves counterclockwise. Check for leaks by turning the faucet on and off. Everything should be functioning smoothly without drips.
Conclusion
Fixing a leaking faucet doesn't require extensive plumbing skills—just a bit of patience and the right tools. With your faucet restored to perfect working order, you'll not only save money and water but also enjoy the satisfaction of a quick DIY fix. Regular maintenance can prevent leaks from cropping up in the future, ensuring your plumbing system remains efficient and reliable.
