How to Repair and Maintain Your Home’s Caulking
Caulking is one of the unsung heroes of home maintenance. It seals out moisture, prevents drafts, and keeps your home energy-efficient. Over time, however, even the best caulking can crack, peel, or simply degrade. Timely maintenance and repair of the caulking in your home can prevent costly repairs down the road. Here’s a comprehensive guide to help you repair and maintain your home’s caulking.
Why Caulking is Important
Caulking serves multiple purposes in a home. It seals joints and cracks from water damage, reduces heating and cooling costs by preventing drafts, and keeps out pests. In bathrooms and kitchens, it prevents water from seeping into walls and under floors, where it can cause significant damage. Around windows and doors, it helps maintain a comfortable indoor climate.
Identifying Problems
The first step in maintaining your home’s caulking is identifying where repairs are needed. Regularly inspect areas where caulking is used, such as:
- Around windows and doors
- In the bathroom, around tubs, showers, and sinks
- Along baseboards
- In the kitchen, around sinks and backsplashes
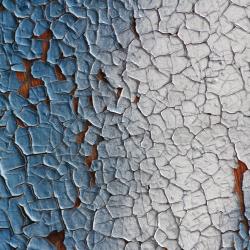
Look for signs of deterioration such as cracking, peeling, or gaps. Mold or mildew growing on or around the caulking is a sign that moisture is seeping in and that it needs replacing.
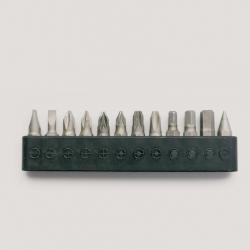
Tools and Materials Needed
Before starting any repair work, gather the necessary tools and materials:
- Utility knife or caulk remover tool
- Caulk gun
- Tub and tile caulk (for bathrooms and kitchens) or latex caulk (for windows and doors)
- Cleaning supplies (soap, water, and a cloth)
- Masking tape (optional)
Removing Old Caulk
-
Safety First: Before you begin, ensure the area is dry and well-ventilated. If you’re working in a bathroom, consider wearing gloves to avoid mold exposure.
-
Cut and Scrape: Use a utility knife or a specialized caulk remover tool to cut away the old caulk. Be careful not to damage the surrounding surfaces.
-
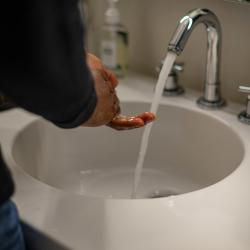
Clean the Area: Once the old caulk is removed, clean the area with soap and water to remove any remaining residue and dirt. Ensure the area is completely dry before applying new caulk.
Applying New Caulk
-
Choose the Right Caulk: Select a high-quality caulk suited for the area you’re working on. For bathrooms and kitchens, a silicone-based, mold-resistant caulk is best. For windows and doors, a paintable latex caulk is ideal.
-
Prepare the Caulk Gun: Cut the tip of the caulk tube at a 45-degree angle, using a small opening for better control. Load the tube into the caulk gun.
-
Apply the Caulk: Hold the gun at a consistent angle and apply steady pressure to lay a continuous bead of caulk along the joint. Smooth it out with a damp finger or a caulk-smoothing tool for a clean finish. Use masking tape on either side of the joint for a straighter line, removing it immediately after smoothing the caulk.
-
Allow to Cure: Let the caulk cure completely. This can take from a few hours to a couple of days, depending on the type of caulk used. Avoid exposing it to water or moisture during this period.
Regular Maintenance
To ensure your home’s caulking remains effective, perform regular maintenance:
- Inspection: Check caulked areas every six months to catch any issues before they become bigger problems.
- Cleaning: Keep caulked areas clean to prevent mold and mildew. Use a mild cleaner and a soft brush to scrub away any buildup.
- Ventilation: Ensure your home is well-ventilated to reduce moisture in areas like bathrooms and kitchens, extending the life of your caulking.
Conclusion
Properly maintaining and repairing your home’s caulking is a simple yet crucial task that can save you from significant repairs and costs. With the right tools and a little know-how, you can ensure your home remains sealed, energy-efficient, and protected from moisture damage. Regular inspections and timely repairs will keep your home in top condition for years to come.